Showing posts with label free bead instructions. Show all posts

Friday, 14 June 2013

Flower Fairy Free Jewellery Project - Charm Bracelet

Ahoy there!

How are you lovely people?

Time for the next Flower Fairy tutorial.  Inspired by the arrival of Summer and lovely flowers plus the delightful bronze findings from the Mad Cow Bead Barn.

These are my flower fairies. They are easy to make requiring only a few basic tools and are fabulous fun for a whimsical grown up or prancing fairy child!

Continuing our tutorials - today a Charm Bracelet!

You will need

Tools
1 Pair Chain Nose Pliers
1 Pair Round Nose Pliers

Findings
1 Bronze Tone Antique Charm Bracelet
8 Bronze Tone Jumprings
8 Bronze Tone Head Pins

Beads
5 Bronze Tone Butterfly Wing Beads
8 10mm Frosted Lucite Bellflower Beads
20 4mm Glass Beads


In terms of skills you will simply need to know how to turn and wrap a headpin loop and to open and close jumprings. A fun easy project for a summer's day!


 1) Gather your supplies! (www.madcowbeads.com is rather helpful for this!)


2) Assemble your fairy by simply stringing beads onto your head pins. I chose a lilac and green colour scheme to compliment the bronze. You can use whatever colours take your fancy!


 3) Hold the eyepin with your chain nose pliers and push the end over to create a right angle.


 4) Swap the chain nose for round nose pliers and finish forming the loop, using your swan nose pliars to pull the headpin tight and close the loop neatly.
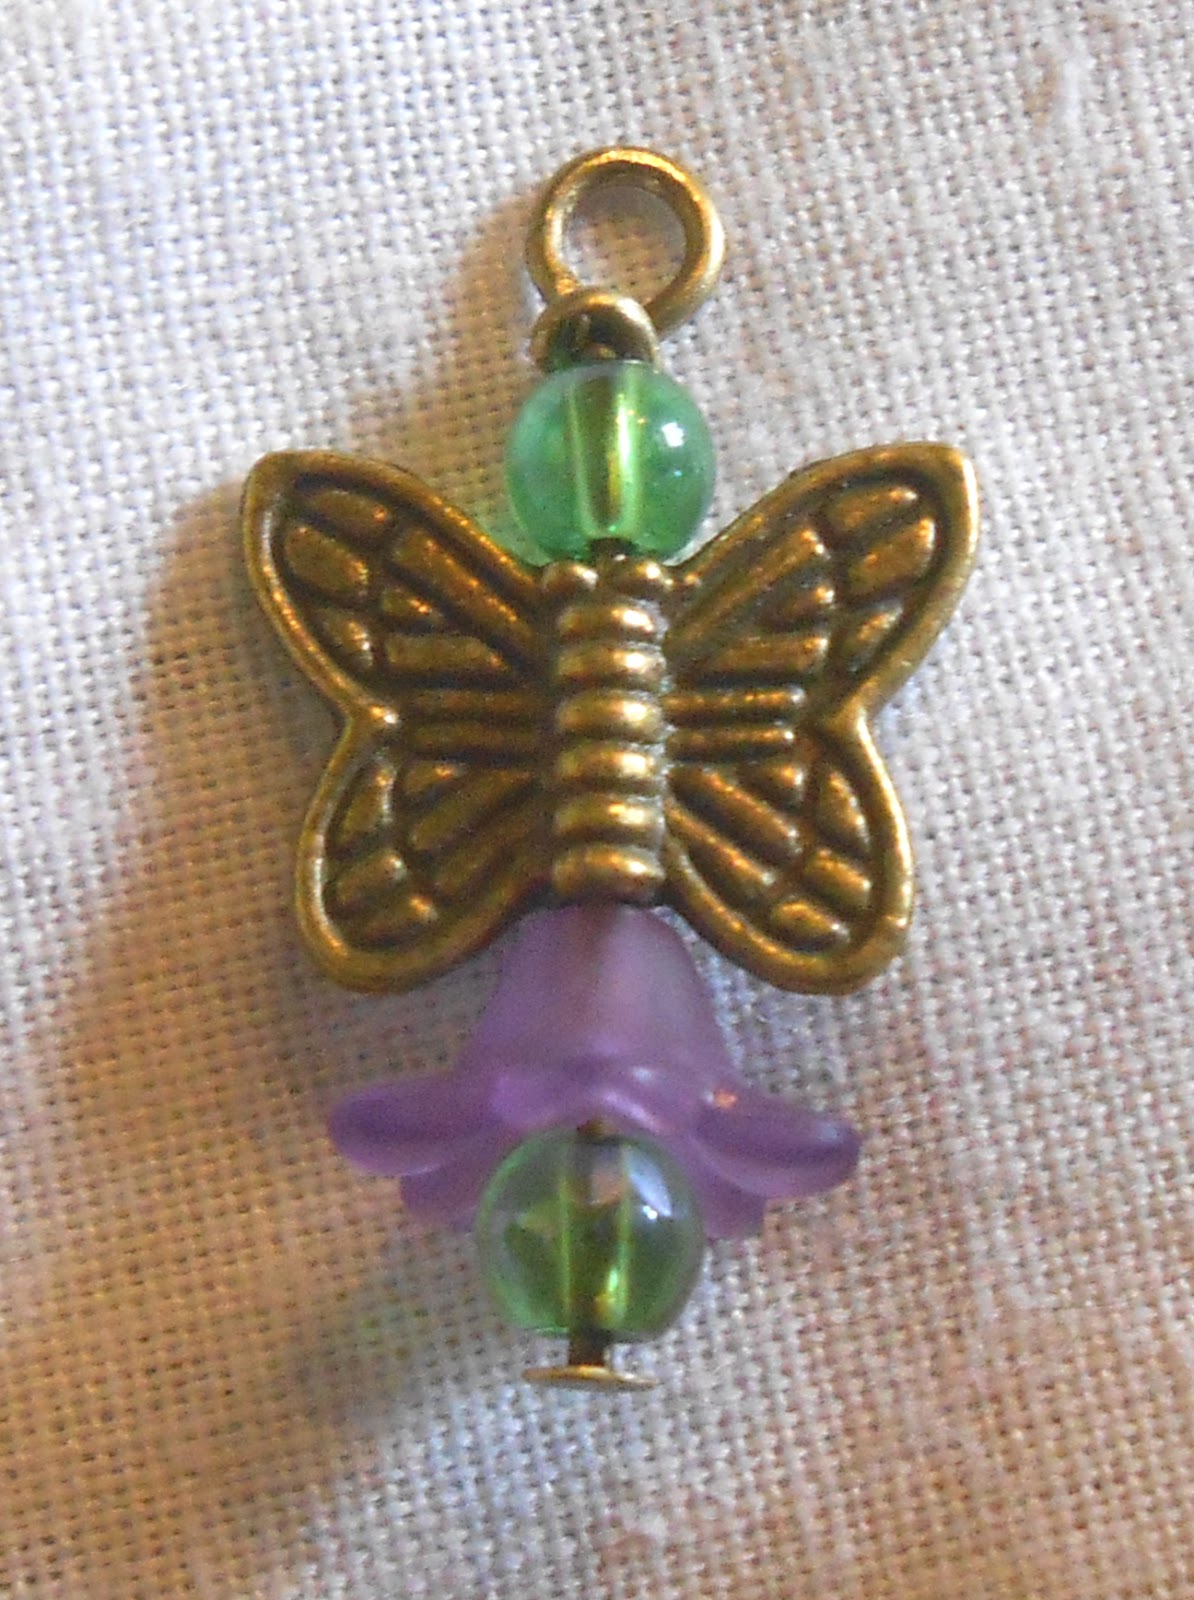


 5) Shazaam! and just like that you have your first Flower Fairy Charm!

The next step is to make him/her some friends - in this instance  I made five for a balanced bracelet.


6) Also, you need to make three more charms - don't be afraid to experiment with your composition :)


7) I like to layout my charms before attaching them to the charm bracelet. This lets me play with the design.


8) The final stage is to attach your charms with jumprings and your bracelet is finished.

For a busier look you could add lots more fairies or even mix and match the colours.


 All of the supplies used here are from Madcowbeads.com and we would love to see your flower fairy makes on our facebook page https://www.facebook.com/madcowbead so please share your makes with us!

The next flower fairy make is a bag charm - coming very soon!

Thanks for reading

Harry


Wednesday, 12 June 2013

Flower Fairy Free Jewellery Projects - Earrings

Hello lovely folks!

I have a few moo-velous tutorials to share with you. Inspired by the arrival of Summer and lovely flowers plus the delightful bronze findings from the Mad Cow Bead Barn.

These are my flower fairies. They are easy to make requiring only a few basic tools and would look perfect with a floaty summer dress.

I am going to give these to you as a series of short tutorials. Today we are starting with Earrings.

You will need

Tools
1 Pair Chain Nose Pliers
1 Pair Round Nose Pliers

Findings
1 Pair  Sheperds Crook Ear Wires
2 Bronze Tone Jumprings
2 Bronze Tone Head Pins

Beads

2 Bronze Tone Butterfly Wing Beads
2 10mm Frosted Lucite Bellflower Beads
4 4mm Glass Beads


In terms of skills you will simply need to know how to turn and wrap a headpin loop and to open and close jumprings. A fun easy project for a summer's day!


1) Gather your supplies! ( www.madcowbeads.com is rather helpful for this! )


2) Assemble your fairy by simply stringing beads onto your head pins. I chose a lilac and green colour scheme to compliment the bronze. You can use whatever colours take your fancy!


3) Hold the eyepin with your chain nose pliers and push the end over to create a right angle.


4) Swap the chain nose for round nose pliers and finish forming the loop, using your swan nose pliars to pull the headpin tight and close the loop neatly.


5) Voila!


6) Make another fairy (sister, brother, mother, 2nd cousin, whatever you prefer!)


7) Attach your fairy charms to the earwires using a jumpring and your first flower fairy project is complete!


All of the supplies used here are from Madcowbeads.com and we would love to see your flower fairy earrings on our facebook page https://www.facebook.com/madcowbead so please share your makes with us!

The next flower fairy make is a charm bracelet - coming very soon!

Thanks for reading

Harry

Friday, 7 June 2013

Flotsam & Flim Flam - Free jewellery making projects!

Hiya

I've been putting together Flotsam necklaces. They're excellent for using up any 'orphan' beads and charms you have - they also work wonderfully with buttons

They're a perfect jewellery making project for impatient makers, or if you make jewellery to sell, these are light on labour and components - and high on impact!


To make the necklaces you will need some basic tools:


  • Flat nose pliers
  • Scissors or snippers
  • Chain nose pliers
Materials for the project:

Materials are really flexible - I've suggested some alternatives that will work well too - just use whatever you fancy!
  • 2mm satin rat tail - a double necklace length (approx 36"- 40" for an adult) alternatively you could use wax cord or even a sturdy ribbon
  • 1 clasp of your choice - lobster, t bar, magnetic - bigger ones are less fiddly for necklaces!
  • 2 foldover clasps - or end of your choice - spring crimps work well too
  • 5mm jump rings
  • Hanger beads
  • Eyepins (if using buttons or other hanging items that need a bail made)
  • Headpins for beads
  • Buttons or beads and charms
Method:

  • Cut the stringing material in 2 and attach the foldover clasps. 
  • For the button version, insert an eyepin through one button hole. Keeping the eye visible over the button rim, bend the pin round and make a wrapped loop just under the eye to make a bail. Do this on 3 buttons, or as many as you want. (These look great loaded with buttons)
  • Attach the buttons to the hanger beads with a jump ring
  • Thread the hanger beads onto the rat tail 
  • Attach the clasp with jump rings
  • You could tie a knot either side of the hanger beads for a different look - allow a bit of extra length before cutting the rat tail though!
  • For the bead and charm version, put the large bead on a head pin, make a loop and attach to the hanger bead with a jump ring. For charms, again attach to the hanger bead with a jump ring
I called these Flotsam necklaces because they work really well with those 'forgotten friends' at the bottom of your craft stash!

Enjoy making your free bead project :-)
Back soon!
Georgie


Sunday, 18 November 2012

Craft Fair Frenzy..

Craft Fairs run all year round, but the main 'buying season' is well underway. I hope that you have queues of eager buyers trying to give you money in exchange for your beady creations!

If you are still preparing makes for Winter Fairs - here's a few tips and ideas from the mad cows. Please feel free to add any of your own ideas in the comments section.

On a Roll - and making like mad?


Stop! Before you get into a mad making frenzy, have a think about what type of customer will be at your Craft Fair. Work out their age, what they might be looking for and how much they will have to spend. Then you can make sure that you create items that your potential customers will love to buy!

Generally, School Fairs and local shows with a low table fee tend to have a similar clientele (although there will be more children at the School Fairs!)

  • Children looking for small presents for their parents, friends and teachers. 
  • Their parents looking for stocking fillers and little tokens for neighbours. 
  • Tourists and browsers that may be tempted by an impulse buy.
  • People who have come in to be nosey / get out of the cold!
These products are idea for this typical customer base:

  • Bookmarks
  • Beaded Keyrings
  • Stretchy bracelets
  • Bag charms
  • Specs chains
  • Christmas decorations
  • Santa / elf keys
  • Wine glass charms
  • Memory wire items
  • Pendants on chains
When planning to make these items, cost out your time, and choose inexpensive beads. One large acrylic bead and some seed beads make a great impact at a very low cost. Because these items typically sell well at low prices, you need to cost them out accurately and save money wherever you can, without skimping on the quality of your making. 


Try these ideas to keep your cost low and your School Fete items flying off your stall!

  • Santa /elf key - spray old keys with hammerite or use big key charms and trim with sparkling ribbon for a great item that easily sells for £1.50-£2 - fabulous for children who are worried about their house having no chimney! You can also make 'vintage' style ribbon out of patterned fabric from charity shops. Just cut 25mm strips, fold inside out and press well before machining the edge. Use a safety pin and a crochet hook to turn the right way in! I was lucky enough to find some 'Liberty print' shirts in a local charity shop - they were a bit faded & thin for wearing - but now have a new lease of life decorating my presents this year!
  • Present dangles (see top pic above) - these are like a tiny keyring - use a 16mm jump ring, tiger tail, a few beads, crimp beads, 5mm / 7mm jump rings and one charm. These look so lovely on gift tag dangles, or even on a table top Christmas tree.
  • The little Dolls House wreath in the 2nd picture is made with a 20mm earring crimp, 4mm glass beads, seed beads and 1 charm, and the keyring is for an elf! Again, 4mm glass beads, seed beads and a key charm. Much cuter in real life!
  • Bookmarks - always a great seller, and quick to make - look brilliant with a single charm and seed beads to keep your costs low and your customer delight high!
  • Large pendants - like this one: 

These are personalised with an image - search the internet for royalty free images to print off and use. Seal the image and then apply Sakura 3D  for a glossy finish. Pictures of pets and inspirational words and messages do particularly well, but I have seen lots of different things used - you can even spread with pva, fill with beads and crystal glaze them! Add a jumpring, thread the pendant onto an organza necklace

Goddess bracelets are very popular - you'll find a tutorial here - my only comment about these is that they can be a little time heavy, so take account of this when pricing! Use a 'wow' button for a really effective bracelet that will sell for £5-£10 with 'normal' beads :-)

I hope these ideas help you with your makes for School Fetes and Fairs this Christmas.


Friday, 10 February 2012

Funky Loops - a fun FREE project from the cows..


This beautiful loopy bracelet was made for madcowbeads.com by Claire Pearcy of www.elderberryarts.co.uk
It's really satisfying to make, and suitable for beginners / improvers.

It's easy to make co ordinating earrings and a necklace using this simple but effective technique

Ring the changes by making one with gold rings and neutral tones!

View and print off your totally FREE project here

Happy beading!

Friday, 25 November 2011

Ribbon & Button Beady Angels

I made some homely little angels - some with heart button wings and others with organza ribbon wings - I hope you like them! The instructions are below. These are quick and easy to make and are a nice Christmas project for children (you'll need to do the crimping and gluing with younger children)


I'm going to use mine to decorate special gifts,  but they're also great for a 'table tree' or hung in windows, or even on cards.


Tools
Flatnose or Chain nose Pliers
Scissors or Snippers


Supplies

Method
  • Cut approx 20cm thread and thread on 1 crimp, 2 3mm beads and another crimp
  • Get the crimps as close as possible to each end of your thread and squash them flat
  • Trim any excess thread
  • Push 1 3mm bead against each crimp (these are the angel's feet)
  • Fold the thread in half - make sure the angel's feet are level, a wonky angel just won't do!
  • Thread a 1 crimp, 1 3mm bead and a floral cone over both threads (see pic)

  • The crimp and 3mm bead hold the angel's body (the cone!) at the right distance above the feet. Measure around 3cm from the top of the feet, depending on how tall you'd like your angel and then squash the crimp flat
  • Push the cone and bead down into position. 
  • Thread a daisy spacer, 8mm bead and another daisy spacer.
  • Thread on the final crimp and squash flat
  • Either tie on a scrap of ribbon and snip the 'wings' into shape, or glue on a heart button
  • Your homespun angel is finished!
Other Ideas
  • Make Snowmen with a similar method - an 8mm white pearl for the body and a 6mm pearl for the head! These also look great in Crystal AB Czech firepolish, but do make sure your thread is clear or they look a bit odd!
  • Fairies are another variation - an acrylic flower makes a fairylike 'skirt' 
  • Pretty up the button wings with a bit of glitter
  • Stitch your homespun figures to a wide ribbon and drape along the top of a mirror or window.
  • Use silver thread for easy extra sparkle
  • Loop the figures onto bookmarks for stocking fillers and thankyou gifts.
Hints and Tips

  • It's tempting to try and make these from the halo down - don't do it! It's much easier to start with, but then it is impossible to get the 'body' crimp in the right place. Always start with the feet :-)
  • If you have too much hanging loop left, thread on a crimp to make the loop the right size, squash it and cut off the excess - no one will know :-D